The Inn at the Crossroads
  • Home
  • About
    • FAQ
    • From Readers
    • About the Author
    • Interviews and Articles
  • Latest Posts
  • Game of Thrones
    • Game of Thrones Recipes, by region
    • Game of Thrones Recipes, by meal
    • The Official Game of Thrones Cookbook
  • Cookbooks!
    • The Official Game of Thrones Cookbook
    • World of Warcraft Cookbook
    • Hearthstone Cookbook
    • Elder Scrolls Cookbook
    • Firefly Cookbook
    • Overwatch Cookbook
    • Star Wars: Galaxy’s Edge Cookbook
    • WoW: New Flavors of Azeroth
    • Star Trek Cookbook
    • Second Game of Thrones Cookbook: Recipes from King’s Landing to the Dothraki Sea
      • Game of Thrones Cookbooks Bibliography
    • Errata
  • Other Recipes
    • Other Fictional Foods
    • Other Historical Foods
    • Everything Else!
  • Contact
    • Sign Up for News!

Tag Archives: easy

Elk Meatballs stuffed with Blue Cheese

“Roundels of elk stuffed with ripe blue cheese were being brought out when one of Lord Rowan’s knights stabbed a Dornishman. The gold cloaks dragged them both away, one to a cell to rot and the other to get sewn up by Maester Ballabar.” –A Storm of Swords

Elk meatballs, stuffed with blue cheese. From the royal feast table at King's Landing. #GameofFood

 Thoughts:

This recipe has been on my to-make list for quite some time, pending only the acquisition of some elk meat. I had originally imagined them as small elk tenderloins, but despite a long search, could only track down ground elk meat locally. So I thought, “How can I stuff them with blue cheese?” And then inspiration struck: meatballs stuffed with cheese. It’s only a little stretch. :)

These are awesome. As they bake, the kitchen gradually fills with this wonderful meaty smell that heightens the anticipation of finally tasting the finished meatballs. They’re roughly two-bite morsels; the first bite reveals a center of melted cheese, the flavors of which meld incredibly well with the gaminess of the elk. I’d planned to serve mine with a sauce, but every last one was eaten before I could produce any… Maybe next time!

Recipe for Elk Meatballs with Blue Cheese

Makes about a dozen small meatballs

Cook’s Notes: Can’t find Elk? Venison, Bison, and Lamb would all work well with this recipe!

Ingredients:

  • 1 lb. ground elk
  • 1 clove garlic, minced
  • 1/2 cup panko bread crumbs
  • hefty pinch each of salt and pepper
  • ~4 oz. block blue cheese, cut into 1/2” cubes

Preheat the oven to 400F. Mix together the first four ingredients, taking care that it is evenly combined. Pinch off a little of this mixture and form around a cube of blue cheese, working to seal the edges. Roll into a ball, and set aside.

Place the meatballs on a cooling rack on top of a cookie sheet with raised edges (to catch the grease). Bake for around 16 minutes, or until cooked through and the cheese is melty. Allow to cool slightly, then serve and enjoy!
Honey Drops – from The Inheritance

“The market in the little town was a tiny one, not more than a dozen shops and stalls and half of them seasonal. She was able to buy a short coil of sturdy line, a long slender boning knife, and then, because there was so little left of her money and life, she now knew, was an uncertain thing, a packet of honey drops for the boy. He’d never had candy before and could scarcely bear to put even one of the bright-colored drops into his mouth. When she finally persuaded him to try a pale green one and saw his face light with surprise at the taste of honey and mint, she folded the packet up tight and put it into the bag. ‘Later, you can have more,’ she promised him…”

–Inheritance, by Robin Hobb


These are lovely. Hard candies that soften in one’s mouth, bursting with mint-honey flavor. I struggled a bit to come up with a recipe that satisfied the description- pale green, minty, and made with honey. They’re not quite as pale green as I’d hoped, but they are very tasty. In developing the recipe, I wanted to use only common historical ingredients, as might befit a fictional world. As such, the food coloring is optional, but adds a nice tint. Before commercially available food coloring, green could be obtained from clover, or lawn grass in a pinch. I have a recipe for pistachio ice cream that uses such a method; very quirky, but a must-try in my opinion!

These drops would also be absolutely wonderful as individual sweeteners for tea!

Honey Drops Recipe

Ingredients:

  • 1 cup honey
  • 1/4 cup apple cider vinegar
  • 3 sprigs of mint
  • green food coloring (optional)

Line a baking sheet with a silpat or waxed paper, and set aside. Combine the vinegar and mint leaves, and puree in a food processor. If you like, you can strain out the mint, but it’s also nice and easier) to leave it in.

Add the honey to the minty liquid in a medium saucepan, and bring to a boil. Continue to boil until it reaches just about 300 degrees F. Be careful to keep from burning it, and if it looks like it’s turning at all brown at the edges, remove from heat immediately. When you take the candy off the heat, immediately stir in the food coloring, if you’re using it.

Before it cools, spoon drops about the size of a quarter onto the prepared baking sheet. Allow to cool, then toss with some powdered sugar to keep them from sticking to one another. In drier weather, they should keep fine with just powdered sugar, but in more humid months, it’s best to store them in the freezer.

DSC00474

Mead Kits

 Elderberry Mead, with kit

For those of you looking for an easier approach to meads, let me recommend the kits sold by Ambrosia Farm. I tried out their Elderberry mead kit, and was delighted with the result! It produces a short mead, similar to what was enjoyed in the 1600s, and can be found in cookbooks like The Closet of Sir Kenelm Digby Opened.

All you need in addition to the kit is 2 lb. honey and a gallon of water. You can stop the fermentation at your desired sweetness level simply by putting it in the fridge.

I loved the flavor and sweetness of my batch after about 6 days. Light, with light floral tones and heavier fruity ones, it was a wonderful and easy brew for the last warm summer evenings of the year. As it sat and aged a few more days at a time, the sweetness decreased, and was replaced with more of an alcoholic kick. It’s a rough kind of mead, but will definitely do the trick! ;)


Marilla’s Plum Puffs – Anne of Avonlea

“Well, never mind. This day’s done and there’s a new one coming tomorrow, with no mistakes in it yet, as you used to say yourself. Just come downstairs and have your supper. You’ll see if a good cup of tea and those plum puffs I made today won’t hearten you up.”

–Anne of Avonlea, by L.M. Montgomery

These are an almost impossibly easy-yet-delicious dessert.

The jam partially caramelizes into a sweet, gooey layer. Under the folded puff pastry, the fresh plums and jam ooze together, a warm flavorful filling. The slices of plums soften as they bake, and contrast wonderfully with the slight crunchiness of the sugar topping. They’re an amazing and impressive showcase of plummy goodness that’s great as dessert, but also turns out to be a very tasty breakfast, if there are any puffs left uneaten!


Plum Puffs Recipe

Prep: 10 minutes       Baking: 15 minutes

Makes 8

Ingredients:

  • 1 sheet frozen puff pastry, thawed
  • 1 cup plum preserves
  • 2 plums, cut into 16 slices (each quarter, quartered)
  • 1 egg, beaten, for glazing
  • Turbinado sugar, for sprinkling on top

Spread out the puff pastry, and cut into 8 equal squares. Spread the plum preserves onto the pastry, the place two slices of plum onto half of each square. Fold one corner over, leaving about 1/2″ of the bottom layer showing. Fold the bottom corner up over the top, and seal with egg. Do the same with each Plum Puff, then brush the top of the pastries with the beaten egg. Sprinkle with a pinch of turbinado sugar.

Line a baking sheet with either parchment paper or a silpat. Arrange the pastries on the prepared baking sheet, and bake at 375F for 15 minutes. Let cool to at least room temperature before serving.

Mushroom Straws

Mushroom. Puff Pastry. Parmesan. Balsamic.

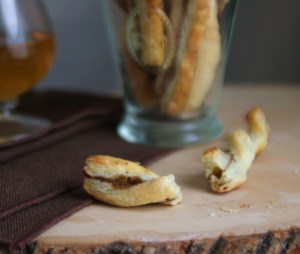
Rich, savory, and delicious, these mushroom straws are an easy snack for parties. Guests will marvel at their deliciousness, never suspecting how simple they were to make. I, for one, ate about half a batch on my own throughout the course of the day. Normally, I would be embarrassed to admit such, but I think you will agree, once you’ve tasted one, that they’re difficult to stop eating.

Puff pastry, in my opinion, is always a win. 

But go on to fill it with this savory puree, and it becomes even better. The balsamic, while not quite robust enough to feature in the flavor, helps to round out the woodsy flavor of the mushrooms. The saltiness of the Parm stands out without overpowering the other components, and the pinch of pepper gives just a hint of a bite.

Truly, try these out the next time you’re expecting guests, and watch how quickly they go!

Mushroom Straws Recipe

Prep: 5 minutes           Baking: 15 minutes

Makes about 40 short straws

Ingredients:

  • 1 box puff pastry (17.3 oz.)
  • 1 shallot
  • 3 Tbs. butter
  • 2 oz. mushrooms
  • 2 tsp. Balsamic vinegar
  • 3 Tbs. grated Parmesan cheese
  • 1 egg, beaten, for wash
  • poppy seeds (optional)
Thaw the puff pastry.
 
In a pan over medium heat, saute the shallot in butter until it’s soft. Add the mushrooms and cook, stirring, for a few minutes until the mushrooms are also soft. Remove from heat, and puree the shallots and mushrooms, along with all the butter, and the balsamic, in a food processor. 
 
Preheat the oven to 400F, and line a couple of baking sheets with parchment paper. Spread out your thawed puff pastry. If it is one sheet, cut into even halves. Gently spread the mushroom filling over the whole bottom sheet of pastry, making sure to go straight to the edges. Lay the top half of the pastry over this.
Brush the top of the pastry with a beaten egg, and sprinkle with a few poppy seeds. With a sharp knife, or a pizza cutter, slice the filled dough into strips about 1/2″ wide. Place the strips on the prepared baking sheets, twisting some, if you like, for visual diversity.
Bake the mushroom straws for about 15 minutes, or until they are a rich golden brown. Allow them to cool for a few minutes before serving. 

Cinderella – Edible Mice


A thoroughly compelling rags-to-riches story, Cinderella has inspired countless films, ballets, books, and songs. I went on a brief fairytale/Disney kick when I got home from Walt Disney World last winter, and am just now getting back to finishing off a few of those posts.

The earliest type of Cinderella story dates as far back as the ancient Greeks, and the account by Strabo in the 1st century BCE. In that story, a large eagle drops a beautiful sandal into the lap of a king, who searches the lands until he finds the woman to whom it belongs. The Chinese version from 860 involves a magical fish, but also has the crucial lost slipper element. The first Italian version, Cenerentola, was published in 1634, followed by Charles Perault’s in 1697, which first introduces the glass slippers. The Brothers Grimm didn’t write their version, “Aschenputtel”, until the 19th century, in which the fairy godmother is actually a magical tree. WILD. 

Like so many of the older stories, the Disney version of this classic tale involves crucial help from animals, most notably mice. These peanut butter mice are so gobbleable that they won’t last long! These were a favorite snack of mine as a child, and I still occasionally indulge. ;)

Edible Mice Recipe

Note: This version doesn’t include a tail, but there are many varieties of candy that could easily fit the role. 

 Prep: 20 minutes  *  Chilling: 1 hour

Yield: 10 to 12 mice

Ingredients:

  • 1 cup creamy peanut butter
  • 1 cup powdered milk
  • 1/2 cup honey
  • sliced almonds, for ears
  • sprinkles, for noses
  • 1 cup cinnamon sugar, or 1 cup white or dark chocolate chips, for dipping (optional)

Mix the peanut butter, dry milk, and honey together in a medium mixing bowl. Roll into small balls, about the size of a large marble, then pinch into teardrop shapes. At this point, either leave them plain, or roll in cinnamon sugar. Press a sprinkle onto the point of the teardrop for a nose, then insert two almond slices for ears. Make the eyes with a toothpick. You may also press the shape of a curling tail into the back of the mouse using a toothpick.

To cover with chocolate, place the plain balls in the refrigerator for at least an hour to chill. Line a baking sheet with wax paper. Melt the chocolate in a small bowl in the microwave, then nestle it in a slightly larger bowl filled with hot water. Remove the mice from the fridge, and dip them one at a time in the chocolate, allow the excess to drip off, then place them on the wax paper. Before the chocolate sets, add the nose and ears, using a knife to make a small hole for the ears in the chilled peanut butter, if necessary. Once the chocolate is set, gently poke holes for eyes with a toothpick, and if you like, drizzle a little extra chocolate on the back for a tail.

Candied Orange Peel

Candied Orange Peel

Our Thoughts:

We made this in preparation for our Oatbread recipe, but it became a fast favorite at The Inn.

It’s such an easy recipe, with impressive results. The delicious candy bites burst with orange flavor, and can be used as a garnish, or added to a wide variety of recipes including breads, desserts, and many others. Perfect for the coming fall and holiday seasons!

Continue reading →

Made something?`

If you’ve made a recipe from the blog, be sure to tag your tasty creations with #GameofFood!

Support the Blog!

If you love the content here, please consider becoming part of our Patreon community!

Support the blog by becoming a patron!

Affiliate Disclaimer

Please bear in mind that some of the links on this website are affiliate links, meaning that if you go through them to make a purchase I may earn a small commission. I only include links to my own books, and products I know and use.

CyberChimps WordPress Themes

All content copyright 2024